Wikipedia
Learn more about KIL
-
Diagrams
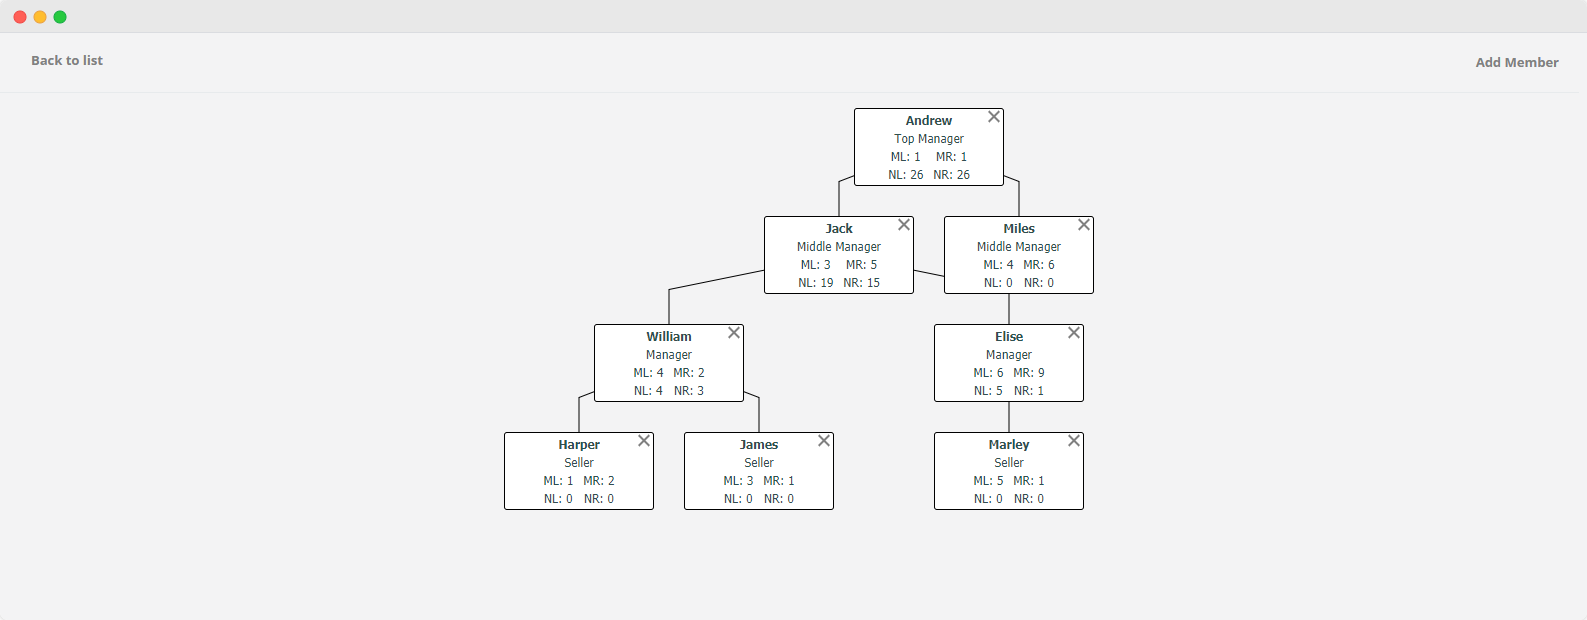
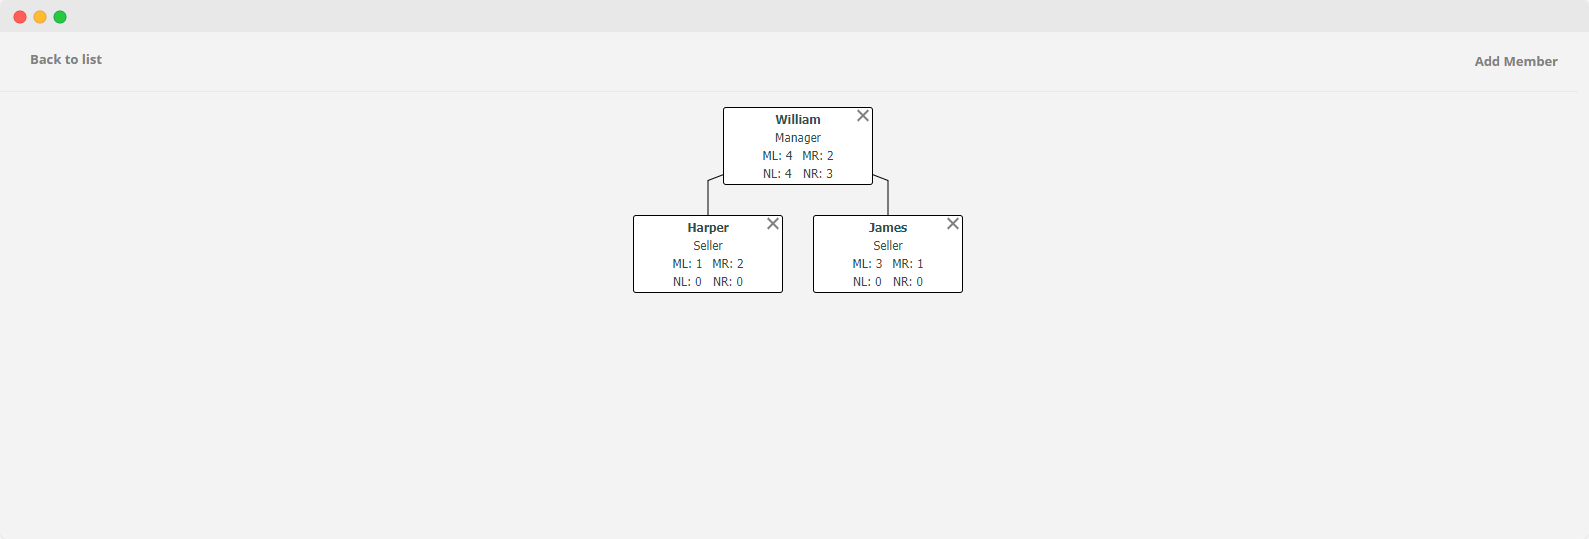
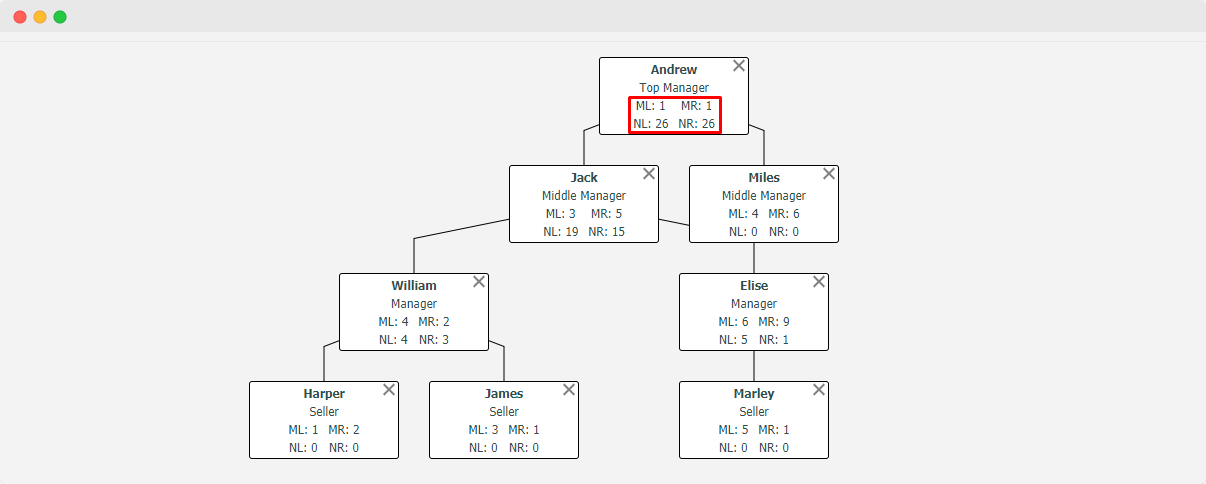
After the registration process, you get access to the dashboard, where you need to add the first users and establish connections between them. After that, you can illustrate this connections by clicking on the "Visualize" button.
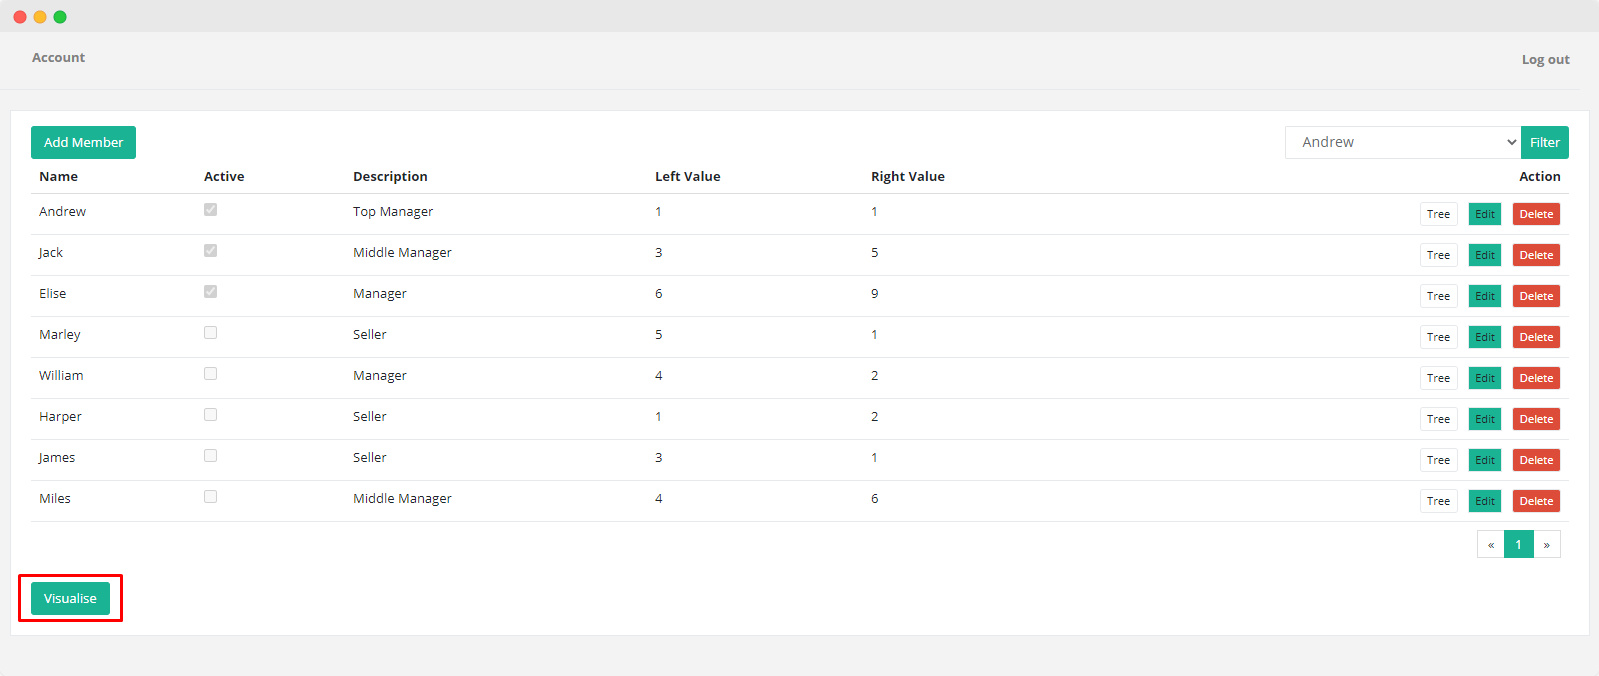
All information is presented in form of a simple diagram.
-
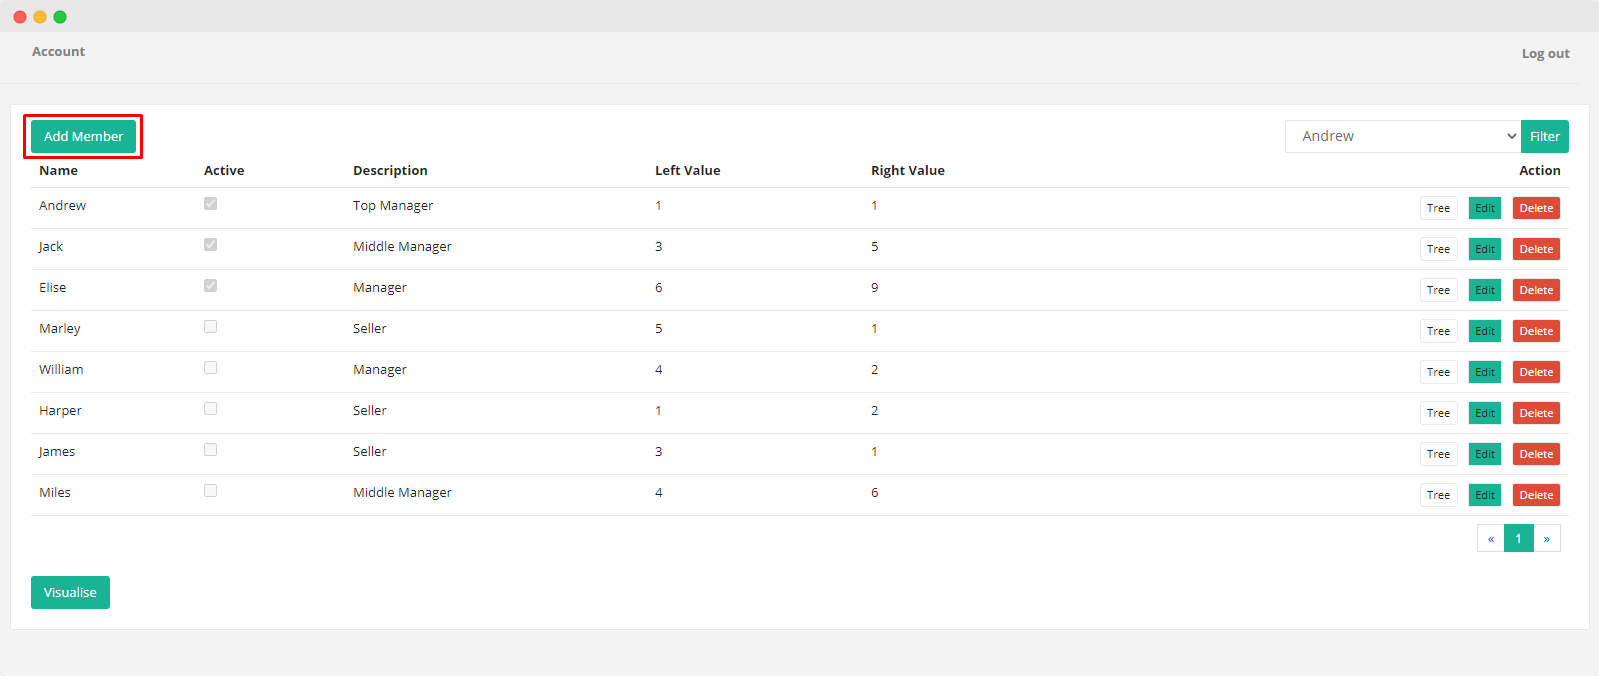
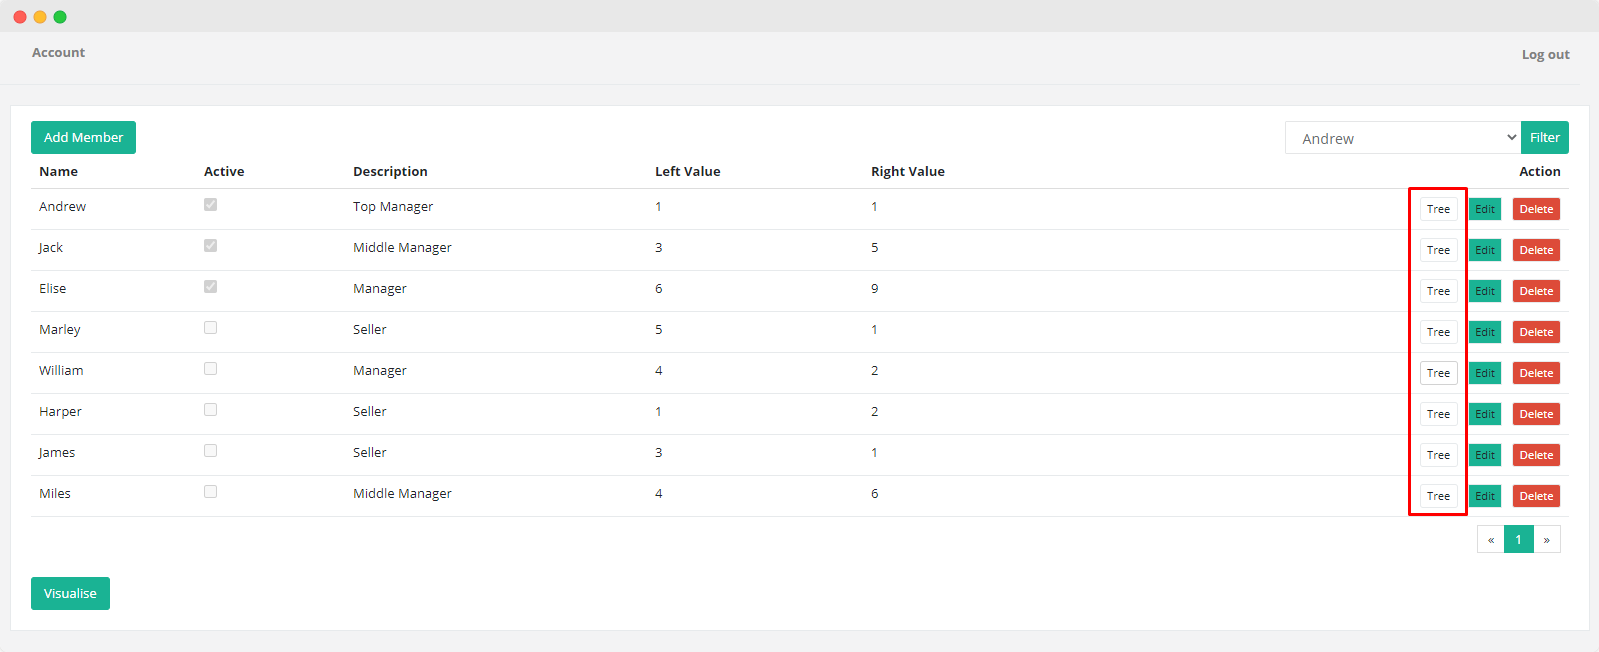
Users
The main page contains a list of all users added to your system. You have 2 options to choose from:
- use non-existent users;
- invite real ones by entering their e-mail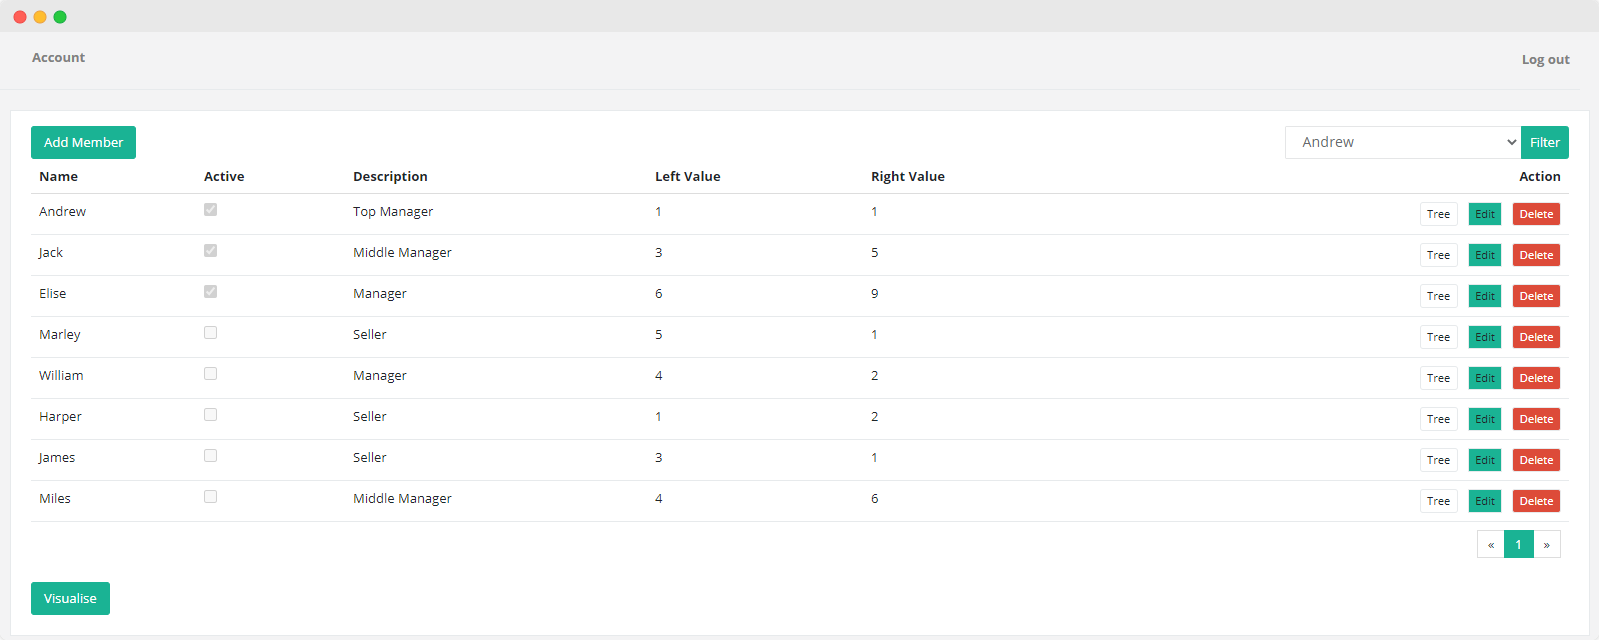
In order to invite a user to the system, click on the "Add member" button.
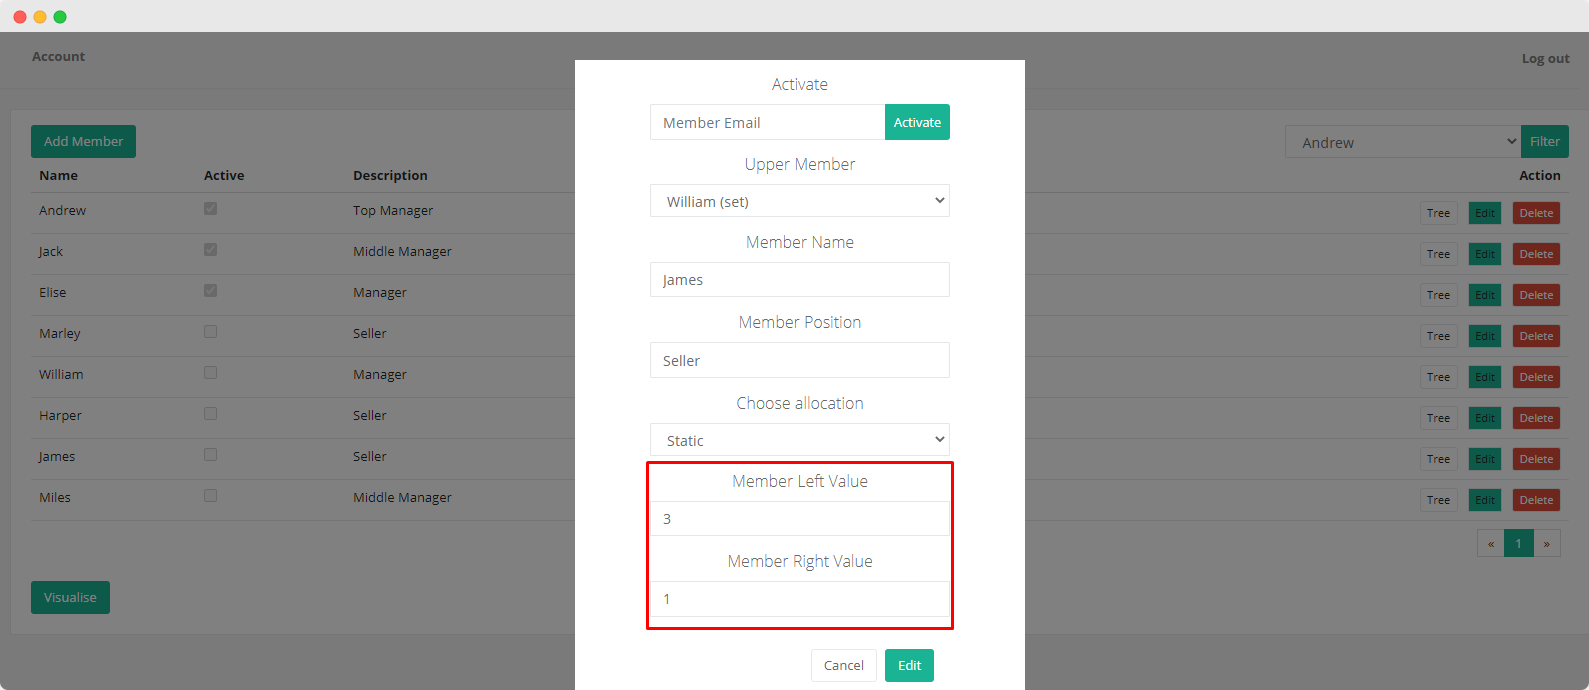
After that, in the pop-up menu, enter the username, position, allocation, as well as specify the upper user to which he will be attached. Now you just need to enter his email address and click on the "Activate" button.
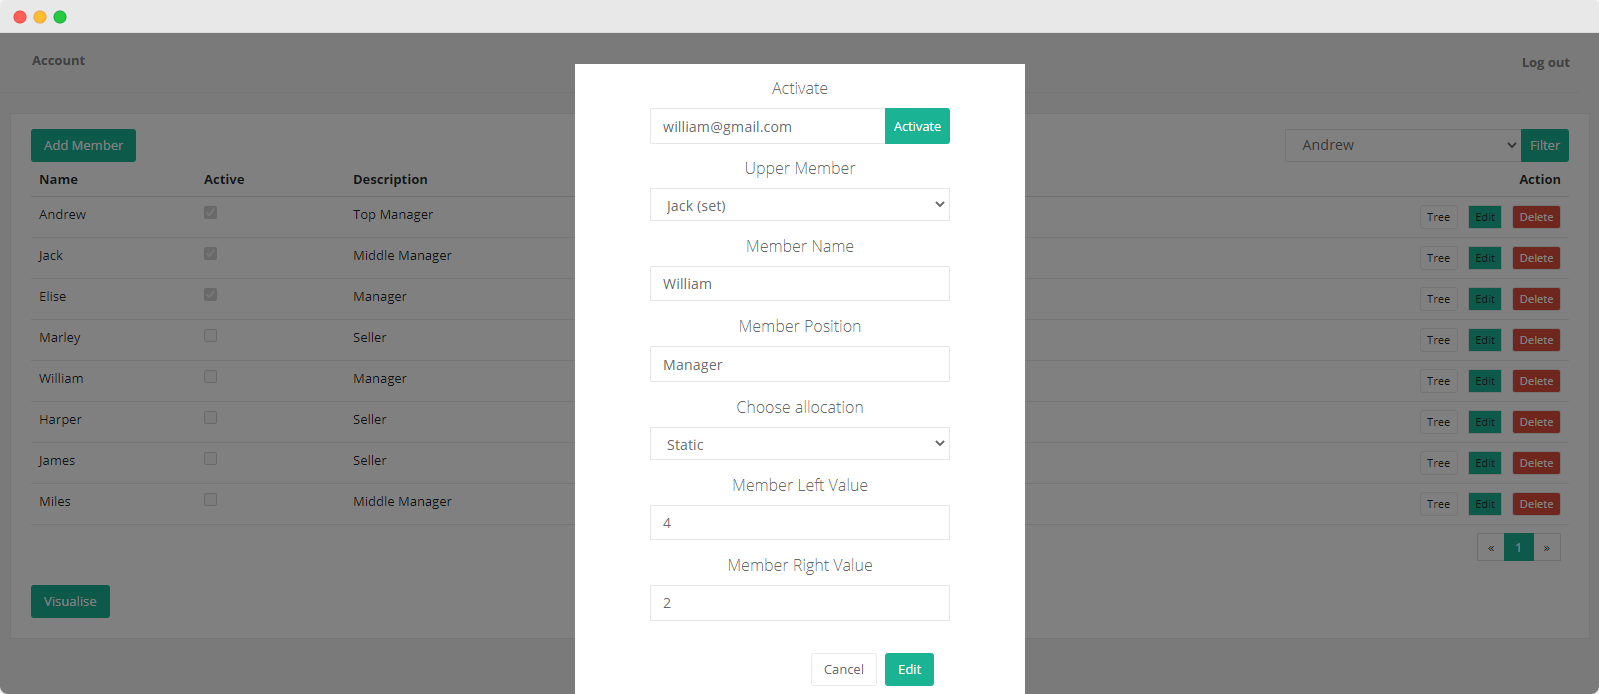
The incoming user will receive an email containing a link to register in the system.
Warning!
When viewing the diagram, the invited user will see only the part that begins with him.
-
Users - Management
You can change the data about your users at any time. To do this, select the user you need and click the "Edit" button.
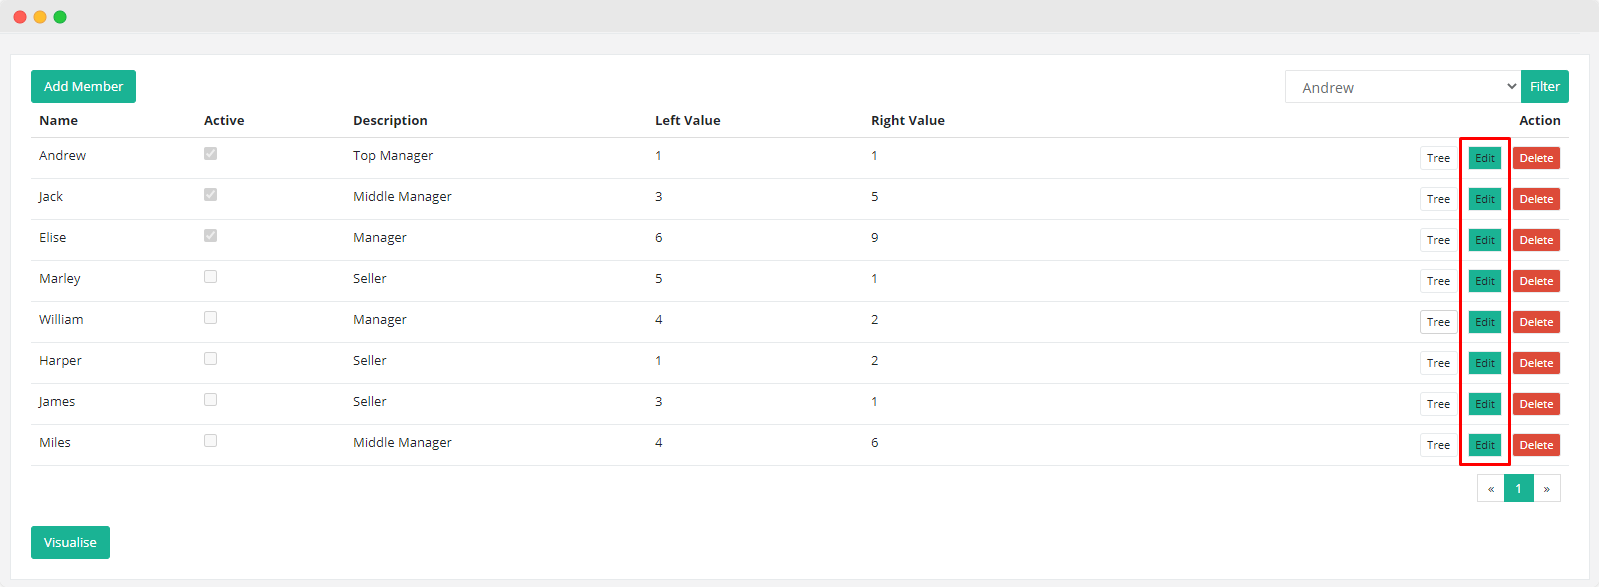
Also, the "Active" column in the main menu allows you to see a list of users who have confirmed or not confirmed their e-mail. You can invite new users by simply entering their email address in the settings.

Another feature that will help you manage users is the Tree button. When you click on this button, you can see the diagram as the selected user sees it.
-
Counter
The built-in counter sums the right and left values of the users below you in the hierarchy. This feature can be useful, for example, to keep track of attracted customers or completed sales.
In order to change the right or left value of a specific user, click on the "Edit" button and enter the parameters you need.